
Techniques > Surveying > Making Survey Measurements
Techniques: How to Make Survey Measurements
Version date: 16 October 2016
- 1. Underwater Surveying
- 2. Survey Methods
- 3. How to Install Survey Points
- 4. How to Make Survey Measurements
Distance Measurements
The survey points we are trying to locate on our site have positions given in three dimensions, X and Y horizontally and Z depth or height. To calculate the positions of these points we make distance measurements and the most typical tools used for this are the tape measure and the rigid rule.
Many different varieties of tape measures are available, they come in different materials, lengths and designs. Because often the tapes are to be used underwater or on muddy foreshore sites some are more suitable than others.
- The tape measure for survey work should be no longer than 30m long
- The markings or graduations are at 2mm intervals but 1mm intervals are better
- Open frame tape measures are better than those in closed cases as they can easily be rinsed off after use and can be dismantled to remove silt and grit
The most common type of tape measure is made of fibreglass reinforced plastic and those with stainless steel or plastic fittings will last the longest. Fibreglass tapes are cheap and readily available from builders merchants but do stretch as they get older. Steel cored plastic tape measures look very similar to fibreglass tapes but stretch very little, these tapes are slightly more expensive and can kink if not handled properly. Avoid steel tapes as they rust very quickly.
A typical fibreglass tape is accurate to 30mm at 30m. The accuracy does depend on the conditions underwater, any current will tend to make the measurement less precise. Measurements over 30m are not recommended as that length of tape is difficult to manage and the sag in the tape makes the measurements insufficiently accurate.
Other tools that we can use include:
- Rigid 1m long rules are useful for recording detail as are plastic folding rules.
- A divers compass can be used for finding magnetic north so it can be marked on a sketch
- A clinometer is very useful for measuring the tilt of ship's structure.
- Large callipers are useful when recording the thickness timbers or dimensions on cannons
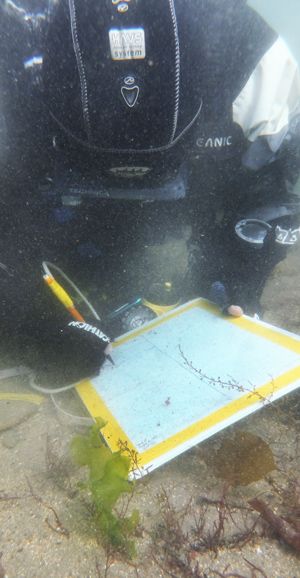
- Planning or drawing frames, see the page about Drawing Frames
- Acoustic distance measuring instruments have been used in place of tape measures to measure distance underwater on some sites, see the page about Acoustic Positioning
- Laser distance measuring equipment has been tried underwater but it only works where visibility is good
- Techniques that have been used in the past include the plane table, the bearing circle, and an underwater theodolite. These methods are no longer used.
Tape Measure Tension
Fibreglass tapes will stretch so the correct amount of pull has to be used to ensure the right distance is recorded when making a measurement. The weight of the tape itself tends to make it sag so measurements will tend to be slightly long, in pulling the tape straight the diver may end up pulling it too much and record a short measurement. Any water current will make the tape bow, this has the same effect as the sag. It is possible to measure the correct tension with a spring gauge but this is difficult to do underwater and is very time consuming. Getting the correct tension can only come with practice but its often more important at first to be consistent with the amount of tension you use.
Only attempt to measure short distances as the effects of sag and bowing on the tape all get worse as the length of tape increases. Keep all distance measurements less than 30m at all times and less than 15m where possible.
Recording
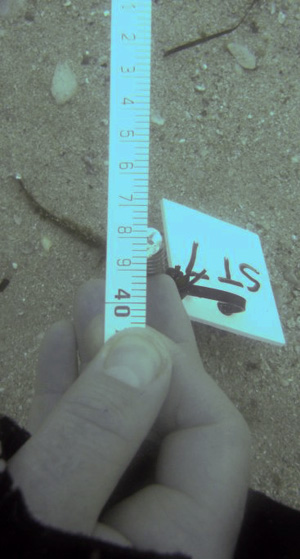
Measurements should be made to the nearest millimetre for most survey work, however for quick assessment surveys measuring to less precision is acceptable.The free end of the tape should be hooked on to a control point and unwound in the direction of the point to be measured. Pull the tape tight over the point to be measured and record the distance at the centre of that point.The names of the relevant points should be clearly recorded on the form along with the measurement itself. Care is needed here as a mistake can be made when the measurement is written down and when it is read by whoever is processing the measurements.
The results should be recorded on a form clearly so someone else can read them as it may not be you that will be processing the results. It is often necessary to refer back to the recording forms during processing to help decide whether a measurement should be used or rejected. A number of factors affect the quality of the measurements, working in low visibility, currents and deep water all tend to produce more frequent mistakes.
- Write clearly in capitals
- Use standard units
- Include a sketch
- Avoid smudging your results
- Include estimates of visibility and current on the form
Tapes are prone to being snagged on other objects between the two points being measured. Where both ends of the tape cannot be seen the tape should be checked for snags before the measurement is taken. Where practical and regulations allow, work in pairs where one diver makes measurements while another just ensures that the tapes are not snagged. Avoid pulling tapes to free them from snags as this can damage fibreglass tapes.
Calibrating Tape Measures
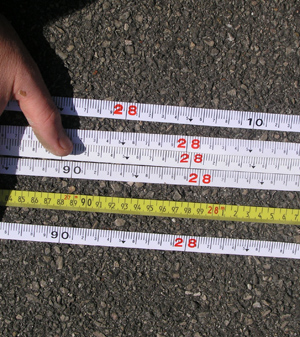
Survey tape measures should be checked regularly at the beginning of any fieldwork and periodically during survey work. Lay all the tape measures being used for the survey on a flat area of ground and compare the distances they measure at 15m and 30m distances under normal tension. Any difference larger than the required accuracy for the survey indicates a problem and that tape should be thrown away. In the figure (right) the upper tape is considerably different to the other tape measures so will not be used. Ideally use a steel cored tape to compare the fibreglass tapes against as steel cored tapes do not stretch.
Recommendations
- Plan the measurements to be made before the dive
- Make the measurements at slack water when there is no current
- Uniquely and clearly identify all survey points
- Clearly mark the survey points with bright markers and big labels
- Use standard forms and teach the divers to use them correctly
- Record in millimetres
- Train the divers in the use of the techniques on land before they use them underwater
- Demonstrate to the divers how and where to measure using the same type of control point
- Where an offset is expected add a field on the recording form
- Ensure the divers swim the length of the tape if both ends cannot be seen at the same time
- Expect to make between 5 and 15% mistakes, make repeat and check measurements.
- Calibrate all tape measures
Depth Measurements
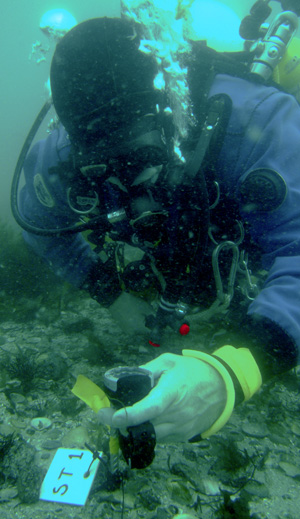
The other component of our survey position is height or depth. The most common tool for measuring depth is the dive computer, these instruments measure the depth of water and display it on a screen most usually to a resolution of 0.1m.
Waves and tides affect any instrument that measures depth. Surveys underwater are frequently done relative to a point on the seabed so we can cancel out the effects of tides. A point on the site is nominated to be the depth reference or temporary benchmark (TBM) for all depth measurements.
Another way of recording height is to measure vertical offsets with a rule or tape measure, this is most often used for recording ship's structure. Dive computers report depth to 100mm but if more accurate depths are required then a bubble level can be used.
In survey terms, measuring height or depth is called vertical control and the principles described here are similar to those used for levelling on land.
Types of Depth Gauge
The simplest way to make reasonably accurate depth measurements is to use a digital dive computer. Analogue gauges should not be used as it is usually not possible to read the depth with sufficient accuracy, say to better than 100 mm.The depth measurement from a dive computer takes time to settle to the measured depth so allow time for the measurement to settle before recording it. Some dive computers are more accurate than others and will give different results at depth so try to use the same computer for all depth measurements.
The depth sensor reading is affected by large changes in temperature so measurements will change as the computer cools or warms up during a dive. If the temperature difference between on land and in the sea is very different keep the computer out of the sun or put it in a bucket of seawater for about 30 minutes before the dive.
The Effect of Tides
Change in the height of tide will affect depth measurements made with a dive computer. There are a couple of things that can be done to minimise the effects:
- Measuring depths at slack water usually gives the smallest change in tide and so affects the measurements the least
- Use one dive just to measure depths of points rather than doing it in a number of separate dives
- Make one control point a benchmark (TBM) or depth reference point. Measure the depth at the start and end of each dive, the difference in the tide height between dives can then be measured in the difference in the depth of this one point. The difference in depth of the TBM between the start and end of a dive shows how much the tide has changed during the dive
The true depth of points on the site is not easy to establish accurately so for most surveys the depths or heights of points are given relative to each other. A rough estimate of the depth below chart datum can be found by measuring the depth of a point at a known time then taking off the published height of tide for that time.