
Techniques > Surveying > Installing Survey Points
Techniques: How to Install Survey Points
Version date: 16 October 2016
- 1. Underwater Surveying
- 2. Survey Methods
- 3. How to Install Survey Points
- 4. How to Make Survey Measurements
Introduction
Survey points are added to archaeological sites to male measurements which are used to create the site plan. Control Points are points we make measurements from and Detail points are on objects we wish to position and that we make measurements to. Survey Control points need to be strong, robust, secure and not wobble when being used.
For a quick survey or a simple site assessment the survey control points can be installed temporarily just for that task. For a recording survey it is better to install the primary control points so they survive for many years as further work may be done on the site, later work will need to use the same survey points so they can tie any new site records to the original ones. If the site degrades considerably or is buried under sediment between visits then the control points may also be the only way to relocate it.
Secondary control points that are installed on the seabed should be installed in the same way as Primary control points but if they are installed on structure then the advice for Detail points should be used.
Control Points
_450.jpg)
Fig 3: Steel reinforcing rod hammered in to a rock seabed, with a yellow disk label and a cable tie above to mark the measurement point
Assessment Surveys
Tent pegs can be used for the temporary survey control points at the two ends of a tape baseline. These are cheap, easy to obtain and easy to carry. Longer pegs will stay more firmly fixed in the seabed or foreshore than shorter ones.
Installing on Rock
For a recording survey the control points should be designed to last for many years. The survey point itself needs to be robust and not corrode away but it also needs to be very firmly secured so that it does not move at all.
Experience on a many sites shows that 10mm diameter steel rod or reinforcing bar in 500mm or 1m lengths work best, mild steel can be used but stainless steel survives much longer.
On a rocky seabed the steel rods can be hammered in to cracks in the rock, one of the reasons for using 10mm thick steel is that it can cope with being hammered without bending. Sometimes the rock holds the rod firmly enough on its own if its hammered in well enough, but often the rod needs to be cemented or glued in as well. Waterproof epoxy putty such as Milliput can be used to fill in smaller gaps but cement is needed for larger holes. To cement in a control point, mix sand and cement with some water and a little PVA glue to make a paste then put small amounts of the mixture in plastic bags. On site, the bags can be forced into the holes for the control point rods and the rods hammered in after. Alternatively the mixture can be squeezed from the corner of a plastic bag like toothpaste; the PVA glue stops the cement washing away while it is being applied and while the cement sets.
Enough of the rod should be left above the rock to provide a secure attachment for a tape measure. The end of the tape can be attached to the rod using a releasable plastic cable tie. The rod needs to be tall enough so that a tape attached to the top of it is above any rocks or structure nearby, but not so tall that the rod is a safety hazard to passing divers or that it moves when a measurement is made to it.
With tall control points it is important to mark where on the rod the measurement should be made to. if the site is relatively flat then the measurement can be made at the bottom but often the top of the point has to be used so the tape is higher than objects on the seabed. Measuring at the bottom of the rod is better where possible as there is less possibility of the point moving. One simple way to mark how far up on the point the measurement should be made is to attach a cable tie.
Survey control points should not be placed within 1m of iron cannons or anchors as it often causes the rod to corrode very quickly.
Things not to use as long-term survey control points on rock are tent pegs or steel rods much thinner than 10mm as they corrode quickly, climbing pitons a they corrode or work loose from the rock.
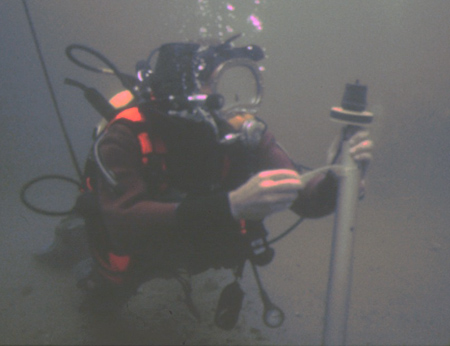
Fig 3: Aluminium tubing hammered in to the sand and used as a control point on the Resurgam submarine site
Installing on Sand and Mud
Sand and mud seabeds bring their own problems and it can be difficult installing any points that are truly permanent. Sand levels can move up and down a considerable amount and mud may be too soft to hold a control point securely.
The same 10mm diameter steel bar used on rocky sites works on sand and mud but a much longer length is needed. For a really soft seabed where the rod simply pushes in it can be helpful to push in one vertical rod then a number at an angle that meet at seabed level which can be brought together with a thick cable tie. The angled rods then provide additional grip and support for the rod acting as the control point.
50mm diameter aluminium tubing will hold very securely in sand and mud, plastic tubing will also work if it is stiff and has thick walls. Tubing may need to be driven in to the seabed with a stake driver or blown in with an air or water lance.
Screw-type ground anchors work well even on soft seabeds. The anchors can be wound into the seabed by hand like a screw, left for 24 hours they become securely fixed into the seabed.
Things not to use as long-term survey control points on sand and mud include car tyres filled with concrete as they simply slide around on the seabed.
Detail Points
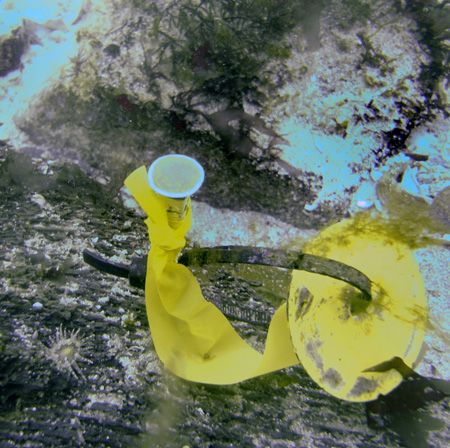
Fig 3: Copper nail used as a Detail Point on the Colossus site (CISMAS)
Detail points are used to position objects and structure on the site. For offset and ties methods a detail point is positioned using measurements from a baseline and in a 3D trilateration survey distance measurements are made from four control points to each detail point.
For a single small object any point high up on the object can be used, the important thing to record is where the point was on the object itself and the object's orientation.
For longer objects such as cannons and anchors the extreme ends can be positions, with cannons it is usual to position the highest point on the base ring and the highest point on the muzzle face.
Two or more points are usually positioned on larger structures. The structure can then be recorded individually and the resulting drawing positioned on the site plan using the detail points as a reference. In this case it is essential that the position of the detail points appears on the individual structure drawing.
For detail points used to position a single object only a record of the point that was positioned is required, so nothing needs to be attached to the object.
Larger objects that may be positioned and recorded separately. For example, two points of a cannon may be positioned then the cannon drawn using a planning frame later on. In this case the points that were surveyed need to be marked so that they appear on the planning frame drawing. Large structures may take longer to record so the Detail points used to position them may need to last a little longer.
When marking the locations of Detail points it is important to avoid damaging the objects as much as possible. Some options for marking include:
- Concreted cannons and anchors can be marked with a cross at each surveyed-in Detail point using yellow road crayon.
- Small copper nails can be lightly hammered in to larger wooden structures so long as the timber is strong enough.
- Plastic cable ties can be lightly secured around the object where the cable tie locking end marks the position to be positioned.
- Avoid using drawing pins, map pins, staples or anything else that is small and made of steel as they corrode very quickly and fall off.
Labelling Points
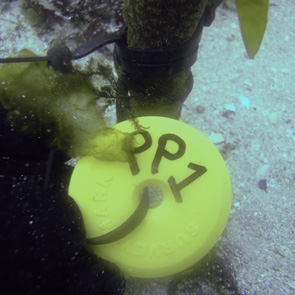
Fig 2: Yellow Disk-Mark disk label attached with two cable ties
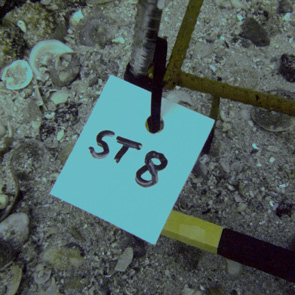
Fig 2: Label cut from polystyrene sheet used on the Colossus site (CISMAS)
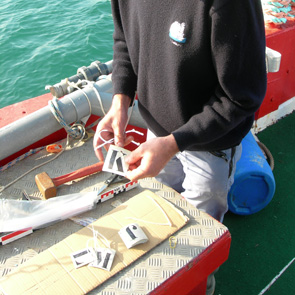
Fig 3: Labels cut from vinyl flooring used on the ZI24 site (Adramar)
Every Control point needs to be clearly labelled and any Detail point that will be in place for some time also needs a label.
Labels for control points need to last for many years so it is worth considering this when the points are first installed. Any label needs to be strong enough to survive the conditions on site and easily read even after many years. For survey points underwater there is often the problem of marine fouling obscuring the label, cutting or burning the name into the label works well as the name can still be read after the weed has been scraped off.
- Yellow plastic Disk-Mark discs are very strong, can have to point name written on with a permanent marker or engraved with a hot soldering iron.
- Polystyrene sheet is less robust, survives well underwater and can also be engraved with a hot iron.
- Labels have also been made from margarine tubs, stamped stainless steel disks and vinyl flooring
- Avoid using garden tags as they go brittle over time and break off
Many exotic or complicated naming schemes have been devised for survey points over the years. The simplest one seems to work the best; number them starting from 1. Appending 'CP' for Control Point and 'SP' for secondary point is helpful.
Recommendations
- Uniquely and clearly mark all survey points
- Make the survey points more visible with bright markers, black and yellow stripes or yellow flagging tape
- Mark the place on the survey point to measure to with a cable tie
- Clear weed from around each point